Showing posts with label Tightwad Tuesday. Show all posts

Wednesday, April 20, 2016

Tightwad Tuesday - Helping Others Save Money with Coupons

Stock photo
Sometimes being a tightwad and saving money isn't just about saving yourself money, but helping to save other people money, too. How? by sharing your coupons.

I was in the grocery store last week and ran across some cake mixes that were an unbelievable deal. (No, I don't usually ever purchase cake mixes, but these were an exceptional deal and I thought I would take advantage of the quick, sweet treat). Not only was it a great price, but if you purchased 4 of them, then you got even more of a savings, making them come out to only 50 cents each!

I got up to the register with them and asked the clerk if I had read it right, "Are these really 50 cents each if I buy 4 of them?" She said, "Yes, but you have to have a coupon to get that deal." My excitement sunk as I said, "Oh, I don't have a coupon." and instantly decided that I would just get one mix. BUT, the woman ahead of me that was still trying to organize everything back into her purse before she left excitedly said, "I have an extra coupon for them and I don't need it. Here, you can have it!" WOW! Thank you! What a sweet and wonderful gesture!  So last night, thanks to this generous woman, we enjoyed some yummy strawberry pancakes made from a strawberry cake mix. Our total cost was about 70 cents!

Over the years I have shared many coupons to help other people save money. I have taken extra coupons that I didn't need and laid them on their matching product in the store. I have also found some like that that other people have done the same with, and it was a great help that was greatly appreciated. For our hobby store, I have printed off full sheets of their %off coupons, used what I needed, then passed the rest out randomly to people in the store. To see the excitement and grateful smiles on so many of them is so warming and makes the time taken for the effort more than worth it. It was when I had once forgotten to bring a coupon in with me to the hobby store and someone gave me one of theirs that I thought to do this. That one little thoughtful gesture not only saved me several dollars, but enabled me to get the other item I had come to get but didn't have quite enough to get both. Once I gave one to a young girl in the line behind me and she got super excited for the same reason, she was spending her birthday money and she could then afford both items she was wanting to get!

Just a small gesture of sharing your coupons could make a huge difference in a person's day, or maybe even their life. So the next time you are clipping/printing off coupons and you start to leave the ones you don't need, consider clipping/printing them, also, and pass them out to someone else that might benefit from them.

Thank you for reading our post.... Have a fantastic day!

NOTE: Yes, it is actually Wednesday that I am making this post. During the time I had allotted to write this post, a bad storm came up and I could not get to the computer, but wanted to get it posted this week anyway. Sorry for the delay.

Tuesday, April 5, 2016

TIGHTWAD TUESDAY - Free Garbage Bags!

There are lots of things that annoy me, but one of the things that annoys me the most in life, is buying something for the sole purpose of throwing it away! Yep, I am talking about trash bags. It just doesn't make sense.

I have pondered ways of solving this problem for a very long time, now. One way of course, is to drastically reduce the amount of trash that you generate. Personally, I think that that is the best way. We, ourselves, are striving every day to reduce the amount of trash that we generate, but, unfortunately, we do still have a little that we have to dispose of. That brings us back to needing to acquire trash bags to dispose of that trash.

About a year ago I discovered a way to get many of those trash bags for FREE!  How? I go to furniture stores and ask them for the plastic bags that are wrapped around the furniture cushions during shipping. When the furniture arrives (such as sofas and easy chairs) and is put out on the showroom floor, those bags that were wrapped around the cushions during shipping are then taken off and tossed out into the trash. When I discovered this I thought, "It just doesn't make sense for these plastic bags to be tossed out into the dumpster, empty, while I am purchasing empty plastic bags to put my trash into!"

So .... I stop into the nearest, local furniture store every chance I get and ask for the plastic bags that were wrapped around the furniture cushions during shipping. So far, they have always been glad to let me have them. Not only does using these bags save me money, but it also gives those bags one more purpose before they hit the landfill.

Have any of you ever used these bags for trash bags? Or for any other purpose, for that matter?
Have any of you ever found any other types of  "free" bags to use as trash bags and if so, what were they? I would love to know!

Thank you for stopping in and reading this post. Have a FANTASTIC day!

Tuesday, March 29, 2016

TIGHTWAD TUESDAY - ReUsable Tissues

Once Upon a Time, people called them Handkerchiefs. Now people call them the Un-tissue, or the Reusable tissue, or the Washable tissue...... you get the idea.  However you want to look at it, or whatever you want to call it, it is a tissue that will save you money, not to mention it probably contains much less chemicals than the paper type, which is much more gentle on our skin.

I found an old, white sheet at the flea market. It had some wear and a small hole on one end so it was only 50 cents! It was soft and perfect for making the homemade tissues I had been wanting to make.

I laid a purchased, paper tissue down on a large piece of paper and traced it off, adding about a half inch seam allowance on each side (all four sides - how much you add depends on how large or small you like to make your rolled hems). I then used this pattern to cut out many tissues from the old white flannel sheet. I can't remember how many I got from this one little sheet, but it was at least a couple of dozen!


With needle and thread in hand and a good crime show episode pulled up on my computer, I sat and hand stitched a rolled hem on all four sides of each tissue. (I packed my electric sewing machine away when I moved and I am going to try just hand sewing for a year).  The one on the left is the paper tissue.... the one on the right is the cloth tissue.

That's it! It is finished and ready for a good, old-fashioned tear jerker movie.  And oh, so soft! These cloth tissues (especially from old, softly worn sheets) don't make my nose nearly so sore as the paper ones do, like when you have a cold and are constantly wiping and blowing your nose. They also don't contain the irritating chemicals and perfumes that the paper ones do.

What about washing them?  The flannel seems to wash very well. I have never had a problem with them coming clean, but I have had a little problem, now and then, with getting other types of cotton fabric completely clean, but very rarely and if you stick to light fabrics, they bleach out nicely.

These handmade, reusable tissues also fold nicely and can be put into the same dispensers as their paper look-alikes. They even fit into the travel packs just like the paper travel ones do. It is simply all in how you fold them.

   May your tissues turn out beautifully, but may you also seldom need them. Happy sewing and thanks for reading this post!

Tuesday, December 30, 2014

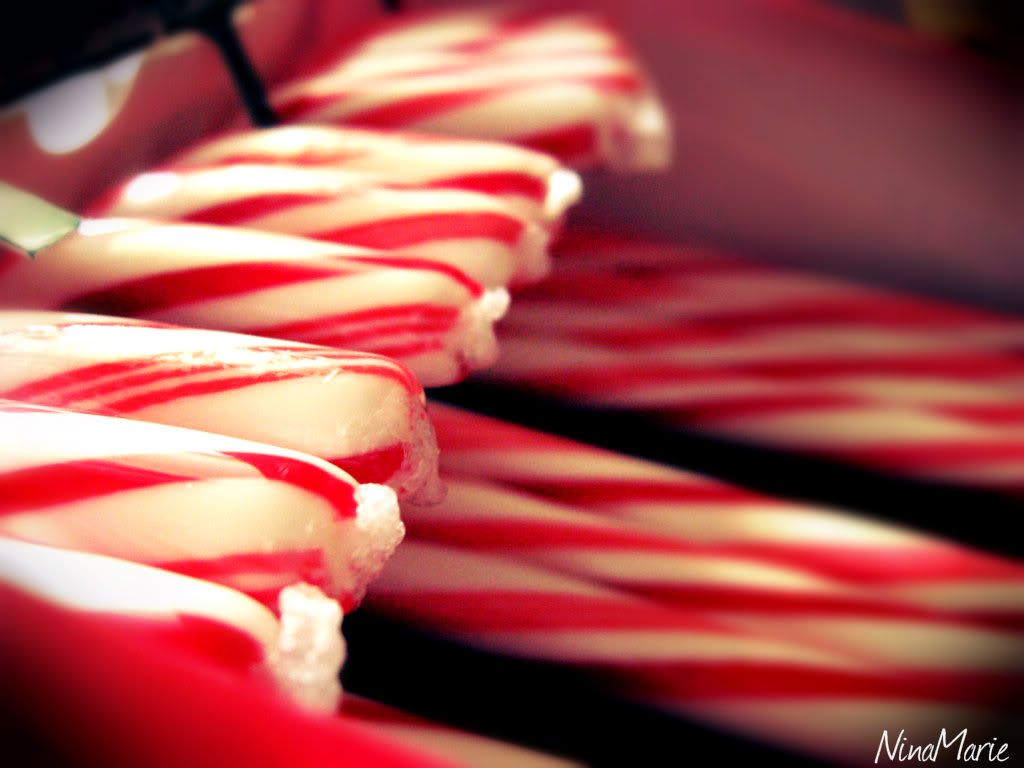
TIGHTWAD TUESDAY - Peppermint Candy Cane Uses

  Christmas is over and many of you have lots of those Peppermint Candy Canes left. Then there are those of us that find them on Super Clearance right after Christmas and like to buy up lots of them because they cost nearly nothing. But what do you do with all of them? We certainly don't want to throw them away, and they don't always hold over to the next year very well.

My personal favorite is to break them up into my Hot Chocolate throughout the Winter. You don't have to break them up very small, just 3 or 4 pieces is good. They dissolve very quickly and add such a wonderful, warm, minty flavor to your hot chocolate.

For you coffee drinkers that like some extra flavor in your coffee, they are also very good in your coffee. Try adding some vanilla creamer with a broken up candy cane to your coffee. Yum!

It amazes me how one flavor can be both warming and cooling. Peppermint in warm/hot beverages seems to make them even more warming. But in the summer, when added to chilled drinks, peppermint can be very cooling. Crush up some Peppermint Candy Canes and add them to your sun tea jar, or your steeping tea pot to dissolve before making into iced tea. You can also do this with your homemade lemonade. Such a cooling summer treat!

Crushed up candy canes are great added with your chocolate chips in Chocolate Chip Cookies. To crush your candy canes, simply place in a zipper freezer bag and roll over them with a rolling pin a few times until they are crushed to your desired size.

Crushed candy canes also make a fantastic ice cream sprinkle in summer! For us tightwads that usually stick to the less expensive ice creams, that usually means chocolate, vanilla and strawberry most often. A sprinkle of crushed candy canes over the top of a bowl of chocolate ice cream can quickly turn it into Mint Chocolate Ice Cream in an instant, for far less than it would cost to buy that flavor, which is usually found in the more expensive brands of ice cream.

When you really start to think of all you can do with those beautiful, minty Peppermint Candy Canes that are on clearance right now for nearly nothing in most stores, the uses seem nearly unlimited!

What do you like to do with your left over Peppermint Candy Canes? or any other flavor of Candy Canes?

Tuesday, November 25, 2014

Tightwad Tuesday - Crusty Cereal

stock photo
   Did you get the outside edge of your cake you just baked too done? Is it a little too hard and crusty on one or all sides? Not to worry. It isn't a total waste. In fact, it can be turned into something very delicious!

I apologize in advance for no other pics, as when I did this with my chocolate cake the other day, I ate it all before I thought to take pics along the way.  And I really don't want to purposely try making another one just for the pics.

Cut off the portion that is hard and crusty, even if it is a little toasty. It will still be good. Now, cut this hard, crusty portion up into small, bite-sized pieces.

Place these bite-sized pieces into cereal bowls and pour milk over all. And there you have it! Homemade Cereal!! It is actually very good, and your kids will think it is great fun! If you unfortunately have a large amount of toasty cake, you can always cut it up and freeze it to use as cereal for breakfasts, as desired.

Nothing wasted, nothing tossed. But awww.... poor chickens. They didn't get to eat the boo boo this time.

Have a wonderful day and scrumptious cooking this week!

Tuesday, May 20, 2014

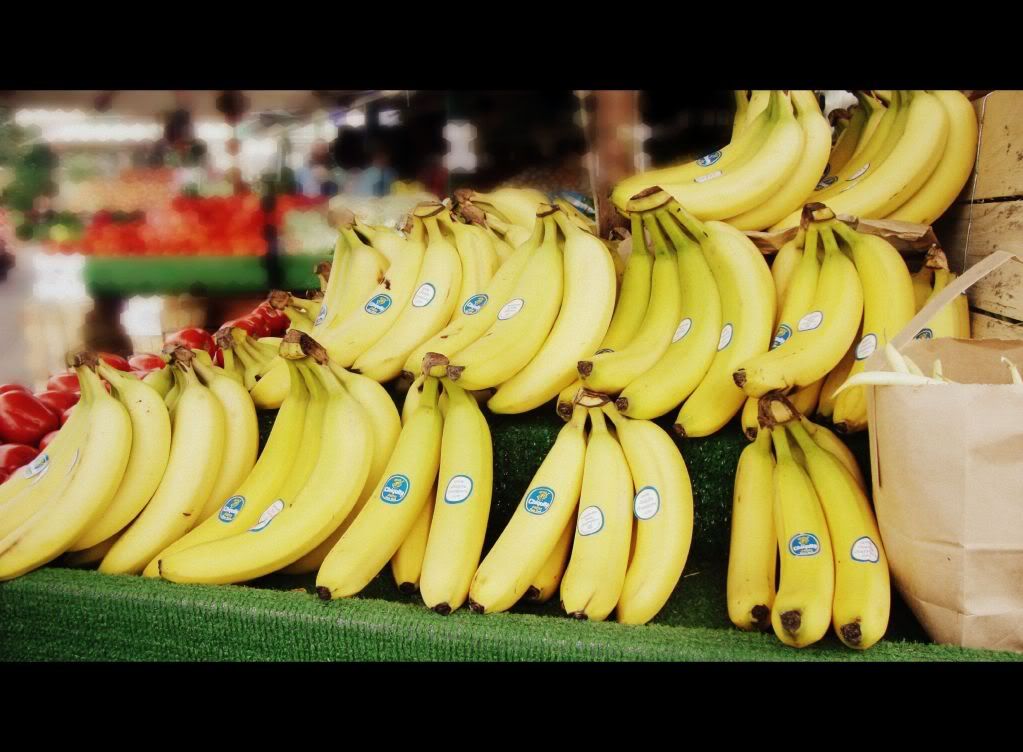
TIGHTWAD TUESDAY - Red Banded Bananas

stock photo
You know, I could not even begin to tell you when the last time was that I bought a regular priced banana. Full price is just way too high (although they are still much cheaper than most fruits), and since they ripen so quickly, you can almost be certain to find them on mark down at least once a week.

Now, the title of this post states "Red Banded Bananas", but I often find them in stuffed full bags for a buck a bag or 3 pounds for a dollar.

With bananas constantly getting ripe and going on markdown every few days, it doesn't make sense to ever buy the full priced bananas. I mean, you have to wait for the full priced bananas to get ripe enough to eat them, and by then, you usually come across the mark down ones. I have one relative that buys mostly the full priced bananas. They are usually pretty green where she gets them. Then she complains about wanting one, but having to wait a few days for them to get ripe enough to eat one. By the time she can eat one of her full priced ones, I have usually found markdown bananas TWICE! I just don't see the logic in getting the full priced ones.

One of our stores has a very unique way of marking theirs down. They never have overripe bananas to mark down! Each day they bag up all of the loose, single bananas and mark them down. These are the pretty, not quite ripe, bananas, sometimes still pretty green. Plus, each day, they have a certain number of bags they use and they just "bag up" bananas until they have used up those bags, placing a mark down price on the bag, just as low as the overripe bananas at the other stores. I love this concept! What is even better is when I am out shopping and can catch these, slightly green bananas on mark down, AND the overripe ones marked down at another store. This works extra good for me because with all the work around here, I usually only go in to town once every week or so for necessities. When I find both on mark down like this, I have bananas to use right away, then by the time they are gone, the marked down green ones are ready to eat! Now THAT'S a bargain AND convenient, and keeps me from running out of bananas in between shopping trips! Well, that is, unless my dog Dusty finds them . . . . but that is a funny story for another post.

As for those narrow, little sticky red bands . . . . . those irritate the heck out of me! You can never find the end to untape them. and most of the produce people seem to think they need to be on good and tight, which badly bruises all of the bananas right through the middle. I have had some that, by the next day, only half of them in the bunch were usable because of that tight, little, narrow red band, and THAT isn't cost effective. Course, the chickens enjoy those.

All in All, Red Banded, Pre-Bagged, or Loose . . . . . Mark down bananas are the way to go! Which way do you prefer to purchase your bananas?

Tuesday, February 25, 2014

TIGHTWAD TUESDAY - Our Nearly Free Livestock Garden

Livestock Garden composted, smoothed out, ready to plant!
 As Dave & I continue to work towards turning our farm(s) into a self-sustaining farm, we question each and every thing we do, asking ourselves how we could do each thing we do around our farm in a more self-sustainable, self sufficient way.

Last Fall, as unexpected illnesses and serious injuries cropped up, making finances tighter than ever, we were struggling extra hard to come up with money for our livestock feeds. Chicken feed was the hardest, as that time of year, we had plenty of brush to cut and feed to the goats. So we ransacked our own cabinets and those of our family and close friends, digging out all that old, out-dated food that had really been needing to be tossed, to keep our chickens fed until we could get back to work and earn some more money to buy some more feed with. (At my house, we can't let the chickens free range because we have to have my herd of dogs running loose to keep the thieves and stalkers off of my property. Plus, they would eat all of my kitchen garden and the neighbors would steal them.)

In addition to all of that, I fed the chickens any excess and deteriorating garden veggies and fruits, along with all the wild edibles I could find to pick. (Which wasn't much since we were drought mode). The chickens loved it! So, we got to thinking, why are we working our tails off to buy all this commercial feed for our chickens (which probably is loaded with chemicals and pesticides, anyway), when we have all this land space and could be growing some for them?! And it would be more healthy for them, and chemical free, which means healthier eggs and meat for us.

So we began planning out a small, 'test' Chicken Garden to plant this Spring. We figured we would start with a small garden for just the chickens, then if it went well, plant some for the goats next year, too. But as we began to pick and choose the veggies to plant in our little Chicken Garden, we realized that our chickens may not eat all of the plants and what they don't, the goats will (such as .... chickens might eat the peas, and the goats would eat the vines), so we started calling it our Livestock Garden. And, I am sure, we will not be able to resist temptation and will want to give our goats 'treats' from the little garden.

Our plan is to keep track of how much (in weight) we harvest from the little space (only about 7 feet x 7 feet), and how much feed it saves us from having to purchase. Then at the end of the season, we can go over our calculations and see if it would be feasible to plant a larger Livestock Garden, one that would nearly eliminate our Chicken Feed bill completely.

We are using up old seeds, leftover seeds, and seeds that we have saved from last year's harvest.. Last year, several people (family and friends) gave me some old seeds. Some of them just didn't want to garden anymore, and some of them are adamant about starting with fresh, new seeds every year. Me, I don't mind planting old seeds and just planting them a little thicker, if it means I don't have to buy any of them and it results in free food for me and my critters! I also found some seeds at the end of the season last year that were 90% off! And yes, I stocked up! That means a $1 package of seeds only cost 10 cents! The 4/$1 seeds were only 2.5 cents per package! We will be using a few of those seeds in the garden, also, but they will probably be the only cost we have for it, which won't be much.

That is our Boxer Fifi in the first pic. She is a bit of a camera hog, lol. Although she is at Anna's Farm right now, hard at work guarding, that is Dave's baby and she IS ultra attached to Dave!

I will give you all updates as our little Livestock Garden progresses. Right now, we still have freezing temps, so nothing much is growing but a couple clumps of wild lettuce, which I will leave in there because the chickens love it, too, and Nature gave it to us for free!


This is what the ground looked like before we started. Many years ago, it was a gravel road bed. Last year we grew some great okra and squash right here.You really can grow food anywhere if you compost enough.

Tuesday, November 19, 2013

TIGHTWAD TUESDAY - Free Tarps

 Yes, I know, today isn't Tuesday, either. But I am determined to get caught up before this week is out. So please, bear with me.

The weather has been beautiful most of this week. A little rain here and there, but very warm (nearly 80° F. a couple of days) and mostly sunny.  But . . . . the forecast just beyond this looks very dreary and cold! We are supposed to have rain, wintery mix, and temps with highs only in the 30s to mid 40s F for well over a week straight!

At the moment, the biggest problem this presents is our chickens here at Anna's Farm. We had planned to have them all moved to Dave's Farm long before now, where there is a nice, proper chicken house, but way too many things have gotten in the way, and they are still here. They are in good-sized pens, completely fenced in, even over the top, with barrels and tubs inside, made into little houses, for them to get into out of the weather, but those darned chickens are so stupid most of the time, that they won't get into their little houses and, instead, run around out in the rain, ugh!

So, with such cold, wet, dreary weather moving in long-term, what are we to do? There still just isn't time to get them all moved and settled in at Dave's Farm (that will be a process of moving a couple at a time for all to adjust) and it certainly isn't cost, nor time effective to throw together a couple of chicken houses. So the next best thing (temporarily) is to cover their pens over with waterproof tarps. But that, too, is a huge expense.

And what about those tarps? Those things absolutely are not made like they used to be! I have not found one in a long while that completely sheds water. With my work at the flea market, and having to cover things up often, I can honestly tell you that there is not an affordable tarp to be found in this area, that will completely shed water and keep everything under them dry! And who wants to pay for a bunch of tarps that don't keep anything dry?! I mean, isn't that the purpose to begin with?

So recently, I stopped at our local furniture store, and, as unusual luck would have it, they had just tossed out a bunch of heavy plastic that they had pulled off of mattresses that had just come in! Even better, they let me have (free) all of it that I wanted!!! Yep, was I ever happy! I struggled to get it all in my car, but I wasn't leaving without it! This is the most wonderful stuff for tarping over anything that you don't want to get wet! It is thick, durable, flexible, and stands up to the elements for a very long time. I use it on my tables at the flea market now, instead of tarps, and no water has ever gotten through.

My two smaller chicken pens are now all snuggly covered and ready for whatever comes. (Be sure and leave air flow so the little darlins' can breathe). On one pen, across the top, I covered it with an old, thick blanket first - for an insulation factor. Then I put the thick, clear plastic over all that and brought it down most of the way over the sides, fastening it all down.

The other piece of plastic that I used was actually foam insulated bubble wrap. It repels water and is insulating! I had a little bit of thinner plastic that I used over the sides of their pen, then I put the insulated bubble wrap all over the top, letting the excess hang over the edges like a canopy (it is a little stiff and stands out good), then fastened all of that down. They look so warm and cozy inside of there, now!

This took all of about half an hour to accomplish, and NO money! I like problem solving techniques like that! Now, granted, this is just a temporary solution, until we can get them all moved over the Dave's Farm. But I am very relieved to know that our little chickies are snug and secure for what is coming the rest of this month, and we were out absolutely no money for our temporary, but secure solution. What do you want to bet though, that now they will finally decide to go into their little houses, ha, ha, ha. I will let you know if they do.

Tuesday, November 12, 2013

TIGHTWAD TUESDAY - - NO, Jack Frost! You CAN'T Have My Hot Peppers!!!

Big Jim Hot Peppers
 Yes, I am getting this up pretty late, today, but that is because we had been out today living our Tightwad lifestyle. We started out the day taking care of a few things at Anna's Farm, ate a great lunch I had tossed in the crock pot before I went to bed super late last night (which consisted of venison, mushrooms purchased on closeout, and onions from a super markdown sale, so lunch for both of us barely cost a dollar total!), went in to town to run a few errands and stopped at our favorite close-out grocery store to see what new bargains they had in. I think the best one this time was the McIntosh apples for 49¢ a pound! Course, the 12-oz box of Russel Stovers Chocolates for $1.99 was an amazing bargain, too!

Then it was back to Anna's Farm to finish up a few more things, after which Dave had to go back to Dave's Farm to tend to a few last minute things before the freeze, which is also how I finished up the day here at Anna's Farm.

We have been so very blessed with such gorgeous, warm Fall weather, along with the perfect mix of occasional showers and light storms. It has been one of the best Fall growing seasons in a long time and as many of you already know, I grew the BEST hot peppers I have ever grown! Some, such as my Tabascos, had not yet finished ripening. Then others, such as the Jalapenos, Big Jims, and Habaneros, I had already picked once, and they had set another crop that wasn't yet ripe. Tonight; however, promised to take all of that away!

An unseasonably drastic drop in the mercury was forecast for tonight, and so far, it is looking like they were right. It is already well below freezing with no signs of its downfall stopping before it reaches 20 F. or lower. Although hard frosts have already killed off most of the vegetation at Dave's farm, here at Anna's Farm, Jack Frost has been staying hidden. And again after tonight, the weather is supposed to once again, be reasonably nice during the days, just above freezing at night, with a little rain mixed in now and then to keep things watered. So, this one night drastic dip in temps really stinks!!!

I had run out of time to get all of my peppers picked. This week has just been too hectic to get every needed thing done! So I finally decided, as the mercury began to drop below freezing, that I WAS NOT going to let ole Jack Frost have my beloved and delicious hot peppers!  So tonight, I went outside, flashlight in hand, and freezing hands because my coat with my gloves in the pocket has disappeared, I started pulling up my hot pepper plants and bringing them into my back room. There were just far too many luscious peppers on those plants to let olw Jack steal them.

Oh, my! There were far more plants than I remembered planting! And the work tonight was definitely not as enjoyable as it was planting them earlier this spring. But I was not going to let my peppers go, so with a couple of short hot coffee breaks to warm my hands, I diligently got ALL of my hot peppers pulled up and into the back of the house! That trail of little peppers and leaves leading from my front door to my back room will just have to wait until morning to be cleaned up. I'm tired! Now, over the next few days, those peppers can ripen a little more right on the plants, in the warmth of the house,  and I can have time to get them made up into Pepper Vinegar, roast a few, and dry some for use in our chili and stews this winter. Such a comfort to know that Mr. Jack Frost did not win at his attempts to take our beautiful hot peppers!

Tuesday, November 5, 2013

TIGHTWAD TUESDAY - Stock vs Your Own Photos

When Dave and I first started writing this blog, we were still very 'green' with the way blogger worked. I had used blogger some, but not a whole lot. Dave was totally new to this platform. And neither of us knew there was a limit to the Photo Space available to us on here, and that you have to purchase additional photo space when that runs out.

We started out devotedly using only our own photos. We thought it was 'cheating' to use Stock Photos, and just not quite right. Then we started seeing our friends run out of photo space on their blogs. One friend just started a sequel blog, rather than purchase more blog photo space, which we thought was pretty clever. Then I also learned that when you use stock photos, it doesn't use up any of your photo memory space on here!

So as you have seen, we have experimented around a little with using some stock photos now and then, because we are just too big of tightwads to pay for more photo space. Besides being tight with our money, I especially get irritated when I have to pay for something I can't see, hear or touch, like photo space! 

So we have decided, that for awhile, when it is appropriate to use a standard stock photo on one of our posts, we will do so. This will enable us to save our photo space for the posts that especially need actual photos of life around our farm, thus, saving us lots of money and hassle, and helping us be able to bring you more of the necessary and fun photos of our life and farm.

What is your take on, and opinion of, Stock Photos?


Tuesday, October 29, 2013

TIGHTWAD TUESDAY - - !mpromptu Picnic

Yes, I know, this is just a little late, but I am really trying to get caught back up on here, so I am going to post it anyway.

A couple of weeks ago, Dave and I were out and about town running errands. As always, we ended up running around much longer than we had anticipated and had not packed a lunch. We just don't have the funds right now to eat out, and, to be honest, we just don't care much for eating out. It kinda scares us.

It was an  unusually beautiful Fall day and we were right around the corner from our local park. We were at the grocery store getting a few groceries and really needed to get back home, but the thought of taking a little extra time to enjoy ourselves at the park for a bit was just too big of a temptation.

We chose some of our groceries accordingly so that we could make a picnic dinner out of them. We decided on Roast Beef roll-ups.  Here is what all we came up with. It looks like a lot, but it really isn't, as we had quite a bit left to eat on well into the week.

The bag of apples was (I think) about $2.59. The veggie chips were $1. They didn't make it to the end of the day, lol. Mayo packets. a nickel each (we only needed 3). Whole wheat tortillas - 10 in the package was $1. The lettuce was 78 cents for a 3-pack of Romaine. A jar of sandwich pickles was just over a $1. And that bag of snack mix candy (our dessert that day and snack two more times) was 75 cents. The most expensive part was the deli roast beef at around $3. We both had water with us to drink, so we didn't need to get drinks.

If you add up just what we used at our meal, it was far less than the price of what it would have cost for just one of us to have eaten at a restaurant! And we knew what we were
eating (for the most part).

The weather was absolutely perfect!  We couldn't have asked for a better day for our impromptu picnic. And some relaxed, kick back time like this, together, was long overdue!

We made roll-up sandwiches, and I do believe they were much better than any burger we could have gotten in the area. Course, everything does seem to taste much better when you are eating outside on such a beautiful day!

 We saved so much money, and this great, spur-of-the-moment outing will brightly stick in our memories far longer (forever) than any quick run to a burger joint. Even if one is financially strapped,  it certainly should never stop anyone from having some enjoyable, carefree time together. And it doesn't take a lot of creativity, just a little thought.

The view from our table was serene and gorgeous, too! You certainly don't get a dining view like that from any restaurant (fast food nor fancy) around here! We were so glad we weren't able to go "grab a bite" at some restaurant on this beautiful day! We would have really missed out on a very memorable and enjoyable outing, and some much needed quality time together.  We can hardly wait to make some time to do it again!

THE VIEW FROM OUR PICNIC TABLE

Tuesday, October 8, 2013

(AF) WELL DARN, THAT DIDN'T WORK

As you all know, I have not been able to be on here much for the past many months. Okay, about a year. And before that, I often had my hands full, computer was down, or various other things that periodically kept me away from this site for a brief spell from time to time.

When I was unable to get on here, one thing that really worried me was our Pharmacy Friday and our Tightwad Tuesday posts (and our Bread on Monday on our cooking blog). Well, I had the bright idea that when I got some time to spare (yes, that is rare), that I would go ahead and write them up, post them on here, then backdate them.

Yes, for those of you that have your own blogs, over there on the side of the compose page, where it says "Schedule" you can actually backdate your posts and put them into any year, any month, and on any day you want. I thought I would do this and fill in the gaps for those posts that were a series. But NO! That didn't exactly work as I had planned.

Yes, after I wrote up some posts, and backdated them under the Schedule, they did go just exactly where I wanted them to. BUT...... that wasn't all that happened. They went into people's blog reading list as though it has just been posted, which it had. And let me tell you posting about 3 Pharmacy Friday posts in a row on an odd day such as Monday, which all came up in the current feed (even though I had back dated them) looked pretty funny and got some raised eyebrows.  Yes, backdating them worked to get them all put exactly where I wanted them into our list of posts, in the correct order, but I could find no way to get them to not come up into the just posted posts at the same time.

So, until I figure a way around all that, there will just have to be some BIG gaps in our weekly series posts, darn it. Now that I am back on a better working computer, I would dearly love to go back and write up the posts for all those missing weeks, but I guess I will let it slide for now and pick up where we left off so we don't hear a lot of, "What in the world are they doing?!"

Wednesday, January 30, 2013

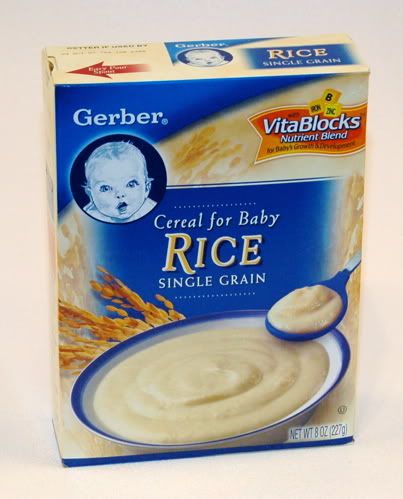
TIGHTWAD TUESDAY - Bargain Baby Cereal Uses

As many of you know by now,  Dave and I are devoted bargain shoppers. We hit the jackpot with one of our recent finds. We found boxes of baby cereal for only 10¢ a box, and powdered, milk-based baby formula for only 50¢ a can!  There was a great variety of the baby cereal, too . . . oatmeal, oatmeal with bananas, rice, and multi-grain. I really stocked up!

So what would we possibly want to do with all of this baby cereal and formula? There are oh, so many uses!!! Today, I will stick mainly with the baby cereal.

First, there are the cats. With business down to nearly nothing this winter, it has been a real struggle to keep all the little darlin's fed. With a little creativity, it can be done, and healthfully, too. I take an old large roasting pan and dump in one box of baby cereal. I then add a few scoops of the powdered baby formula on top (I do not recommend using the soy formula, as it sometimes makes them pretty sick, and you can't use the milk-based long term), a dribble of leftover meat drippings (if I have any, optional), add some water and stir until the right consistency for my cats' tastes. And VOILA!!! 10 very happy and satisfied cats for only 25¢!

One of my favorite uses for the oatmeal or the multi grain cereal is as a binder in Chili. When you are making a big pot of homemade chili, a little baby cereal can give the texture that something it seems to be missing. After you have cooked your chili as long as you want to, add in a sprinkle of baby cereal (I like oatmeal the best and a little will do ya), stir, and let it simmer just a few more minutes. If you don't think you have added enough, you can then add more, but start with just a little. The purpose is to enhance your chili, not make meaty baby cereal. It thickens the sauce/broth just a little, giving the chili some body, and binds all of the ingredients smoothly together.

I tried making some bread with some of the cereal and it turned out great! I replaced about 1/2 cup of the flour with 3/4 cup of the multi-grain baby cereal in my bread machine and it was wonderful! The outside of my loaf was a little crustier than usual, but it was golden and great with a pot of homemade soup.

Last night I made pancakes for dinner. I thinned my batter down just a little bit (just a LITTLE) and added in a good sprinkle of the oatmeal with bananas baby cereal. Then I stirred in some frozen blueberries and cooked as usual. That was so good that when I run out of baby cereal, I just may have to buy some more to make those pancakes again!


We would love to hear what your uses are for extra/leftover baby cereal! 

Tuesday, January 15, 2013

TIGHTWAD TUESDAY - Dinner for only 25 cents!

My latest bargain shopping find was Sweet Potatoes for only 19¢ a pound. Not as good as last year's 10¢ a pound, but still a fantastic bargain! They were all medium to large in size (some as much as 2 pounds) and looked really fresh. As you can guess, I really stocked up.Good thing, too, because when I went back, they had raised the price back up to 29¢ a pound. It must have been a stock reduction sale. I hate it when they do that, though. I figure, if they are making money off of it at the lower price, it just isn't right to jump the price up higher because the stock is running low, or because people have had time to try it and and see how good they are. For the most part, I love that store, but I hate that part about them. I have lost count as to how many times they have drastically raised the price of an item as their stock begins to dwindle or when word of mouth spreads as to how good something is and interest picks up.

Okay, so back to the sweet potatoes. I LOVE a good, baked sweet potato for dinner. I can make a whole meal off of a sweet potato (and often do). So, needless to say, I have been thoroughly enjoying sweet potatoes for dinner a lot lately. And they are so easy to fix.

Since I heat my home with a wood stove, it doesn't take any extra energy (or cost) to cook my sweet potatoes in the wood stove. And let me tell you, you just can't beat the flavor of them cooked that way, either! I make sure the fire and coals are pushed to the back and a little to one side. At least leave some space where no coals are touching. Then, in the empty space (I like to use the corner, up against the hot cast iron, just inside the door) I put my sweet potato and close the door.  Every 20 to 30 minutes I give the potato a little turn. Depending upon how hot your fire and wood box is, and the size of your sweet potato, it could take anywhere from an hour to 2 hours or so to bake your sweet potato. I used a sweet potato that was about 12 ounces.

When removing the sweet potato from the wood stove, be very careful as it is extremely hot! BBQ tongs work great. Once done, I take it out, place on a plate, split open down the middle and give a little inward push to each end to really open the potato up. I top it off with big slices of pure butter (also purchased on a recent bargain find.... $1.49 a pound, but this, too, will be even less once we have our own milk-producing cow), and a generous sprinkle of Morena sugar (natural evaporated cane juice).  Sometimes I also add a small dash of True Cinnamon. And there you have it..... a most delicious dinner for only 25¢!!!


Yes, the peeling gets a little charred and I don't eat that part. But don't worry, it doesn't get wasted. I tear it into small pieces for sharing sake and my dogs eagerly gobble it up, thinking I have given them a really special treat. 


Tuesday, January 8, 2013

TIGHTWAD TUESDAY - Dinner for Two for Under $5

Yes, we are very late with this post today, but that is because we had to live it, before we could post it.

It is no secret that finances are a real struggle right now, but then it is for a growing number of the population these days. We are both extra careful with how much we spend on food, while still trying to eat nutritiously, and we never dine out any more (for reasons of cost and food chemicals). Every now and then, though, it isn't about just the quick bite to eat without having to cook, but about the dining experience together, unrushed time together, relaxed time together, a break from the daily mundane, an actual date.

With us both having had a stomach bug, we decided we wanted something light, like soup. There is a little hole-in-the-wall, private owned Chinese restaurant that I absolutely love, right on our errand route. We don't eat Chinese very often because it is usually laden with MSG, but I have never had a reaction to anything that I have eaten at this restaurant and we enjoy the once in a blue moon treat. This evening, we decided that a bowl of their soup sounded like just the thing. It is usually a pretty calm, quiet atmosphere there, and very reasonably priced, too. 

Dave ordered a bowl of their Egg Drop soup and a couple of Egg Rolls. I also ordered the Egg Drop soup and a large bowl of rice. Their bowls of soup are generously sized and come with a large package of crunchy rice noodles. I love those noodles... I could sit and munch on them all day!  My rice was steaming hot, light and fluffy with some kind of leafy green vegetable cooked in with it. With a little soy sauce splashed over it, it was yummy! Fortune cookies were included with the meal for dessert. We both just got water to drink. Theirs is filtered and very good (and free).

So, we had two large bowls of Egg Drop soup, two large packages of crispy Rice Noodles, two Egg Rolls, a large bowl of steamed Rice, two Fortune Cookies, great tasting water, and plenty of condiments to pour over everything (including bowls of fresh made sweet and sour sauce). It was an absolutely wonderful meal, a great, relaxing environment, and best of all, great company. We ordered at the register, but they even served us at our table!

The total cost for our entire dining experience . . . . . . $4.94! Yes, that was for both of us together, not each of us. I am so ready to go again, but then, I am also curious to see what other Tightwad meal we can come up with next. We will be sure and let you know.

What bargain dining experiences and ideas can you share with us?

Tuesday, December 11, 2012

TIGHTWAD TUESDAY - Don't Toss Those Pumpkins!

Jack Be Little Pumpkins (white ones included).... They are so cute that none of us, kids nor adults alike, can resist them. Some just get one or two to paint a face on for Halloween, and some get a bunch of them to scatter amongst their Fall decor. Then, long about now, if you haven't already, they end up getting tossed out with the spent Fall decorations. But you know me, I hate throwing stuff away and wasting things.

Did you know that these darling little pumpkins are not only decorative, but very tasty and good to eat as well?! Last year I ended up with several and just couldn't bring myself to throw them out. They were pumpkins, and it seemed such a waste, so I decided to do some digging and see if they were good to eat at all. To my delighted surprise, I learned that they were not only good to eat, but there are many great recipes all over the net for cooking them! Just type in "Jack Be Little Pumpkins Recipes" into your search box and all kinds of recipes for them comes up!  You can even bake several of them, scoop them out, and make an ordinary pumpkin pie. They have so many uses that I can't believe so many of them are just tossed into the trash this time of year (or any time for that matter). You can even fill each one with a handful of your favorite meatloaf recipe and bake for great, individual meatloaves (a fun way to get kids to eat meatloaf, though I still doubt it would work on me, lol).

Although the wall of these pumpkins is very thick and provides each individual person with a generous, nutritious serving of vegetable, there are also lots of seeds in the center of each one. The seeds easily come out and can be cleaned and used to roast or to plant to grow even more the next year, or you can roast most of them and save a few to plant for the next year. You can really get the mileage out of your money on these great little pumpkins if you first use them for decoration, then cook and eat them, then plant some of the seeds to grow more for the next year. I still can't believe how many of these get tossed into the trash each year. It just doesn't seem right. Oh, and if you don't like to eat them, they are also great fodder for goats and chickens. Here is my favorite way to cook them.... Click Here

If you have other ways of cooking them, or other ways to use these adorable little pumpkins before they are trashed, I would love to hear them!

Tuesday, December 4, 2012

TIGHTWAD TUESDAY - Christmas Buttons!!!

Normally I am not one to support large corporations, but this was just so good I had to share.

This year, finances are tighter than they have ever been, literally. Not only does it appear that buying Christmas gifts is out of the question, but even getting supplies to make them is proving to be a difficult challenge. But a few days ago my oldest daughter called me with some information that may be a great help.


A large retail chain here in the US, JCPenney,  is having a wonderful Christmas promotion I honestly don't know if it extends beyond the US or not). Daily, until Christmas Eve or until they run out, they are passing out Christmas Buttons. (like little lapel pins) These are the most adorable buttons! I would stop in just to get the buttons, they are so cute. But it gets even better. On the back of each button is a code. You go to their website and enter that code to see if you have won a prize!

They are giving away millions (literally) of prizes. They are giving away trips, merchandise, great coupons, and gift cards. Examples of the coupons are: $5 off of a $5 or more purchase, $10 off of a $10 purchase or more, etc. You can't combine coupons, but even still, you can always make small purchases and still save a bundle! I saw some wonderful sleep pants on clearance there the other day... they were originally $10, on clearance for $6. If I had had a $5 certificate to use, I could have gotten those soft, warm, top quality pants for only $1!

No purchase is necessary to get the buttons. You just go into the store (even daily if you like) and ask for some Christmas buttons. You can enter two codes a day from now to December 24th. Not all buttons are winners, but if I have it right, the odds are about 1 in 4 that a button will win something. That is great odds! And the buttons alone are fun and nice to wear and collect. There are about 50 of them and, who knows, if you can collect some complete sets, they themselves might be worth something later on down the line. So far I have entered about 16 buttons which has resulted in a total of $20. I'm excited!

I live too far out and can't go in to town every day just to stop into this store to get buttons, but I am hoping that I can go at least a couple of more times before they run out. I haven't received my certificates, yet (they are very backlogged, already) but they will come, and when they do, we are going to enjoy doing some shopping! And, as usual, I will look for the best bargains and really stretch it out. In the midst of such hard times, this store's Christmas promotion has been a true blessing for many.

You can find out more about the promotion here.
 You can also find them on facebook. There is also a picture there of all of the buttons. I am not sure which one is my favorite, but I think I am leaning on the one with the two kids on the sled in the snow.
I do hope this post can help some of you as well.


Tuesday, November 20, 2012

TIGHTIGHTWAD TUESDAY - Don't Toss Those Turkey Bones!

Turkey Carcass Soup
That wonderful, Thankfulness filled, Turkey Day is almost upon us... just two more days. All over the USA, more turkeys than I could possibly count are sitting in the bottom of refrigerators thawing out, waiting to be deliciously smoked - roasted - fried - or cooked any number of other interesting ways.

When that anxiously awaited Thanksgiving meal time arrives, that multitude of turkeys all gets carved and the serving platters filled. As those platters of sliced turkey empty, the remainder of the turkey is pulled off of the bone and served as guests continue to stuff their already bulging tummies with even more tasty turkey.

But what happens next in most households is downright sinful! Most people toss that empty carcass and those bones away! Ugh! What a waste! Those bones may 'look' empty, but there is still far more to them than the average person would think.

Place all of those bones into a large kettle and cover with water. Bring to a boil and simmer for at least an hour or so. With a slotted spoon, remove bones to another pan or tray to cool. When you examine those bones, you will be amazed to learn that there was still quite a bit of turkey left on them. It easily turns loose after it has been simmered for awhile. What is left in the pot is a wonderfully large amount of turkey soup stock that can be used in a multitude of ways.

My favorite thing to do with all of this is to make soup. I remove all of that turkey that turned loose of the bone during simmering and add it back into the stock pot with a mix of vegetables  and spices - whatever yo have on hand.... simmer some more, add cooked noodles, and it is the most wonderful soup! At this point, the bones can finally be sent to the compost pile.

That turkey broth can be used for so many other things, too. It can be used to make gravy, mashed potatoes, rice .... the possibilities are endless! Can you believe people throw all that yummy food-still-to-come away after the turkey has been taken off the bone? What an enormous loss of some very delicious, nearly 'free' food. By adding your own homegrown vegetables, it could very well be a free pot of soup from something that is ordinarily tossed out. It is a great place to use up all those veggies that are beginning to get bad spots in them and need to be cut up into something. You know, there is only one of this kind, and one of that kind.... not enough of each kind to really do anything with? But by tossing them all into the turkey bone broth pot, they all blend together wonderfully!

If you have any additional good uses for turkey bones after all of the turkey has been pulled off of them, we would love to hear them! Just leave your suggestions, ideas and uses in the comments below.
HAPPY THANKSGIVING!!!


Tuesday, November 13, 2012

TIGHTWAD TUESDAY - Nearly Free Dog Treats

 I like to spoil my dogs, and give them treats when they are being really good. I also give them treats to train them with, to encourage them to be good, and just because I love them and enjoy watching them enjoy their treats so much. But with the number of dogs I have ended up with, and the majority of them are large, buying that many dog treats on a regular basis just isn't possible. Plus, many of those store bought dog treats have stuff in them that I don't want to feed my dogs.

You can make some pretty tasty dog treats simply out of stale bread and a little of that frying grease that you were getting ready to toss out. Any kind of old bread will do (so long as it is just stale and isn't molded). Our local discount bread store often has what they call "feed bread" for sale. It is bread that is outdated far enough that they aren't allowed to sell it for human consumption, but it isn't molded yet. A bag of it usually has from 4 to 6 loaves of bread in it for $1. Lately they have had a big surplus of it and most of it has had 6 loaves in it.  Let me tell you, you can get a LOT of dog treats out of 6 loaves of bread!

You can also use slices of homemade bread if you actually have any that has dried out beyond use. Stale hamburger buns, old biscuits,donuts, hot rolls, anything of the like can be used.

You will also need some 'tasty' fat. The best thing to use (for your little fur ball's favorite flavor) is that grease you have been frying your meat in and you just don't dare use it again but really don't want to throw it away. You can also use butter (a little more costly), fat that you have skimmed off of soup, or any kind of meat drippings.

Preheat your oven to about 350 F. Lay your bread slices out on a cookie sheet. If you are using burger buns, hot dog buns, rolls, etc, cut them in half and lay them out flat. If your fat is solid and not liquid, melt it in a small pan before your next step. With a basting brush, lightly brush the top of each bread slice with the fat of your choice. A little garlic powder can also be sprinkled on at this time if you (or your dog) likes, but that is optional. Cut each bread slice into the right sizes for your dog to eat. My dogs like them cut into long strips. Spread them out evenly around on the cookie sheet, making sure there is air space around each one.

Place the pan of bread slices in the preheated oven. Bake for about 5 minutes, to get them started drying, then turn the oven down to about 250 F. Bake until they are completely dry and no moisture is left. Be sure and check on them often to prevent burning. When I think they are done. I turn the oven off and let they stay until all is cool to be sure no moisture is left in them. When completely cooled, store in an airtight container in a cool, dry place. Feed to your dog as a treat as desired. Mine love them! They not only like the flavor, but they love the type of crunch these treats provide. Oh, and my cats love them, too!

Anytime you have a little bit of grease/fat that you would normally toss out, put it in a container and into the freezer to save for when you also have some old bread and then time to make your pet some tasty, and nearly free, treats!

Tuesday, November 6, 2012

TIGHTWAD TUESDAY - Milk Carton Uses

      So many people don't stop to realize that, not only are they paying lots of money for that product they are using, but they are also paying quite a bit of money for the package that it is in. Sometimes, more of what we spend on an item may actually go for the packaging than for what is in it!

Most people use up a product, then toss the packaging in the trash without giving it a second thought. But what if I took you to the store, had you purchase a shopping cart full of just packaging, such as boxes, nice glass bottles, plastic containers with tight fitting snap on lids, etc.... you paid for them all, then I took you over to the dumpster and said, "Now toss them all in the trash!"  You would think I was nuts, wouldn't you? Well, I think some people are nuts for throwing away some of the packaging they throw away. For a better perspective of what portion of a product you are spending on your packaging, a visit to Uline might help. Go through their prices, add up a weeks worth of packaging that you would normally toss, and see how much money you are literally throwing into the trash each week. 

There are many ways to save money on packaging, and I will get to some more of those in later posts, but today, I am going to be talking about repurposing some of those packages, namely, milk jugs. That is a lot of good, sturdy plastic to be throwing away! I have somewhat of a system I use for re-purposing mine. I start by rinsing mine out really well.

Their first purpose is as water jugs. Periodically, I have to haul quite a bit of water here and there around the farm (especially during this past year's drought), so they get a lot of use as water jugs. Once they spring a leak, they have other uses.

I then cut the jugs in half through their middle (jug standing upright, horizontal cut through the middle). If the leak is in the top portion of the carton and the bottom is still in tact, the bottom gets used to put under plants to hold water for them. They sometimes also get used as pet food dishes.  Then the top is set aside to use as a scoop. For scooping dry ingredients, it doesn't matter if it has a small leak.

If the leak is in the bottom of the jug, I then use the bottom as a planter, to start veggies in for the garden. Often times I even add additional little drainage holes. The top (without any leaks) then makes a great funnel with the lid taken off.

If I start having too many of these building up, or too many of one half, I cut them into strips. I write on these strips with permanent marker and use them to label my garden plants and herbs.

There are so many uses for empty, plastic milk cartons that I couldn't even begin to list them all here, but we would love it if you would share in the comments, your ideas for recycling/re-purposing plastic milk jugs. This also includes plastic gallon water jugs, as well, and any other plastic gallon jugs. Oh, yes, sometimes I pour up my homemade liquid laundry soap into them.  The reuses are endless! Of course, they could also be completely eliminated by raising our own milk.